
Docker has been around for years, yet have I never touched it in some ways. Unitil now, when I realised that more and more out there are built arount containers.
After some research, I decided to go with Docker and Portainer. It seems fair to start the container journey with a nice and simple GUI on top for easier administration and overview.
Configure Network
To begin with, you need a clean Ubuntu server. I went for an Ubuntu 18.04 LTS.
Once you have the server up and running, we need to add a second NIC. We will use this NIC later on to create a “switch” for the containers, which we then can give each and one an own IP address.
Add your new NIC in the /etc/netplan/50-cloud-init.yaml file. We will not set an IP address as we will configure this per container later on. Make sure to set the NIC’s name accordingly (mine got the name ens192).
network:
    ethernets:
        ...
        ens192:
            dhcp4: false
Save, close the file, and verify the configuration with the following command:
netplan try
If all goes well, apply the new configuration with the following command:
netplan apply
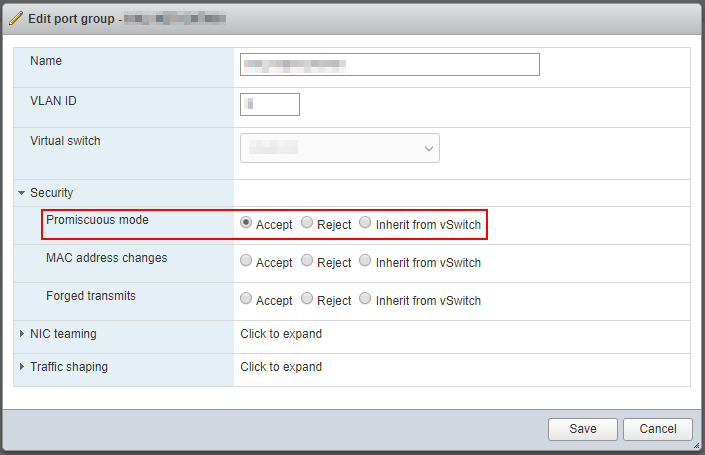
Now comes the crucial part. For the communication to work when running Ubuntu on a VMware ESXi host, promiscuous mode must be enabled on the port group (on the vSwitch). This part I had to figure out my self using trial and error.
Setup Docker
We’re now ready to continue setting up Docker. I used the following guide: https://docs.docker.com/install/linux/docker-ce/ubuntu/
Setup Portainer
For Portainer, I used the following guide: https://www.portainer.io/installation/
Configure macvlan
To be able to give each container their own IP address, we need to configure macvlan. I used the following guide to set it up: https://www.portainer.io/2018/09/using-macvlan-portainer-io/
Setup a Container
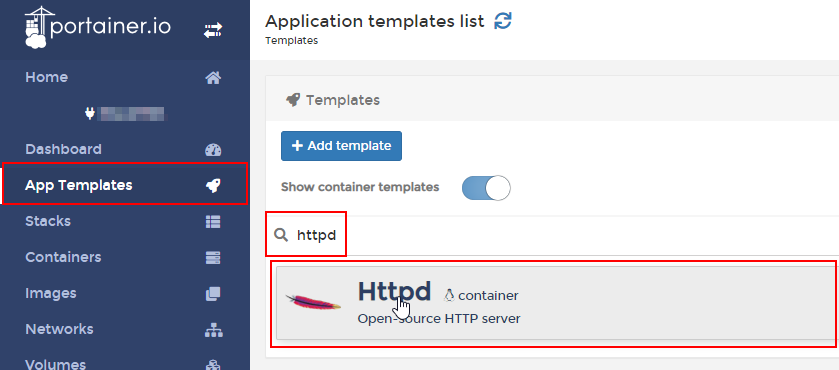
Now we’re ready to setup our first container. I started with an httpd container, just to try it out. Click on App Templates, search for httpd, and select it to configure and install the container:
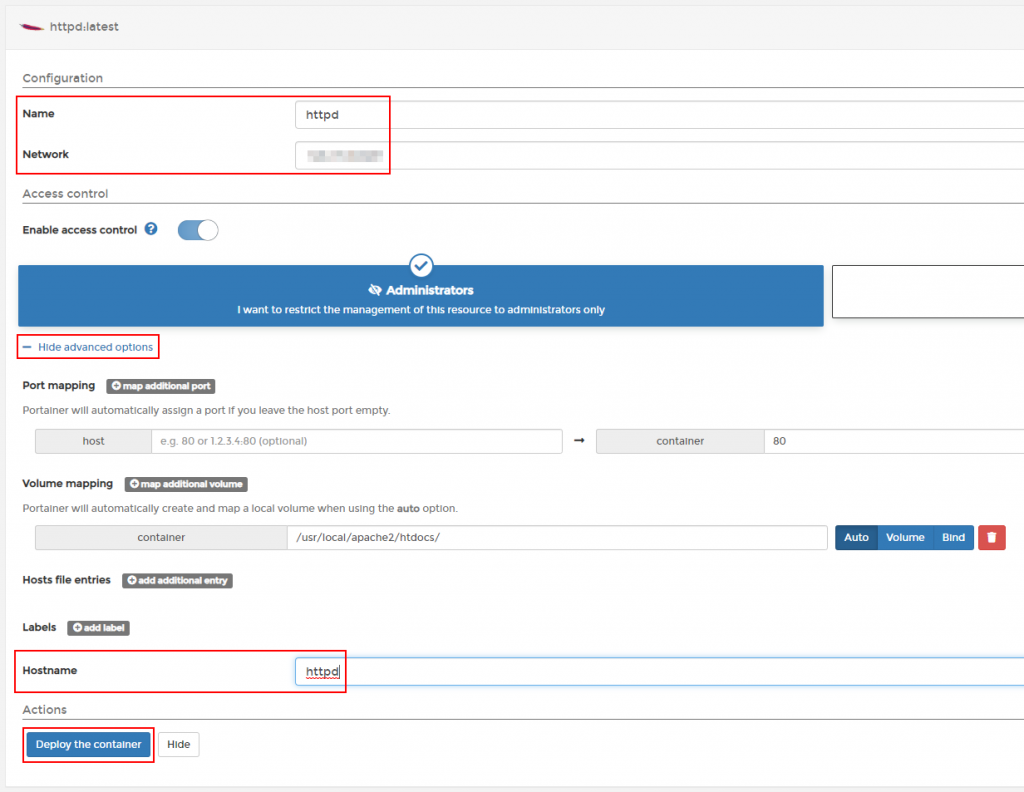
Give it a name. I name all my containers the same name as the template itself. In the Network drop down list, select the newly created macvlan network that we created using the above guide. At last, click on Show advanced options and give the container a hostname. This could be anything you want the container to be named in your network. I always keep the hostname the same as the container name. Now click on Deploy the container to deploy it.
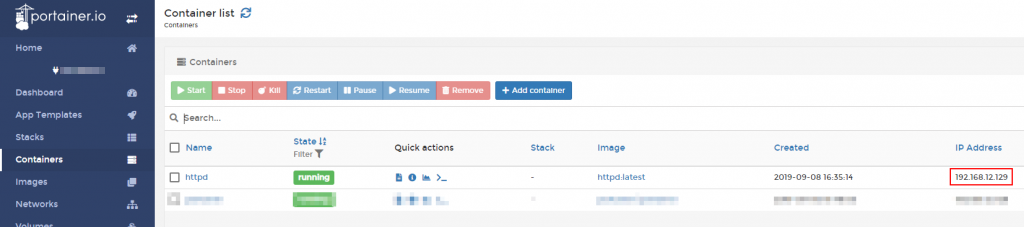
That should be it! Go to the Containers section and locate the newly crated container. Look at the right to find the IP address given to the container:
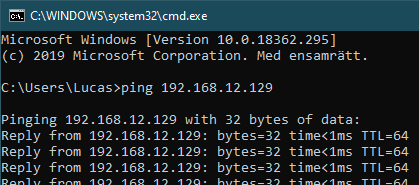
Verify that the container is working as expected by ping the IP address:
The httpd container is now up and running. Try to browse it:

It works!
Configure Persistent IP Address
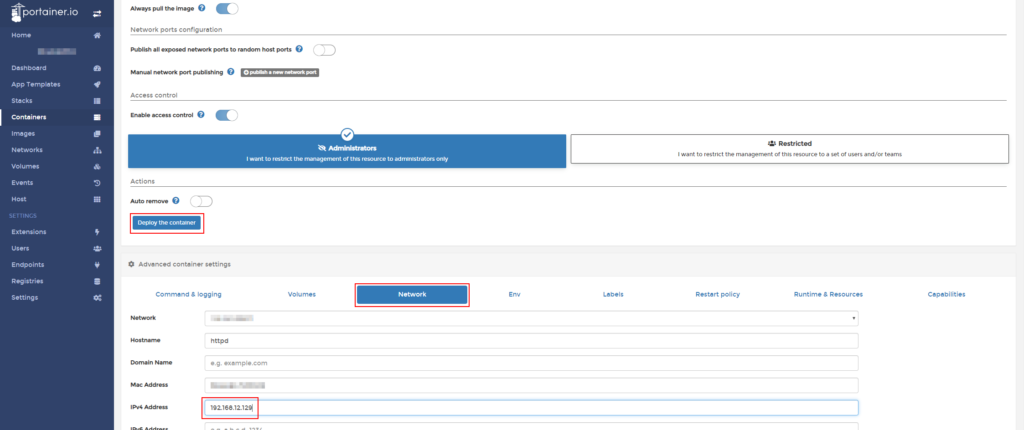
Before you lean back and open that beer, we should do one last maneuver to make sure the container will always get the same IP address. In the containers list, click on the container’s name to open it, click on Duplicate/Edit, scroll down to Advanced container settings, click on the Network tab, and enter the IP address in the IPv4 Address field. Save it by clicking on Deploy the container to re-deploy it with the new settings (keep calm, nothing inside your container will be lost, as all the data is stored in a persistent storage).
Bonus – Add linuxserver.io Repository
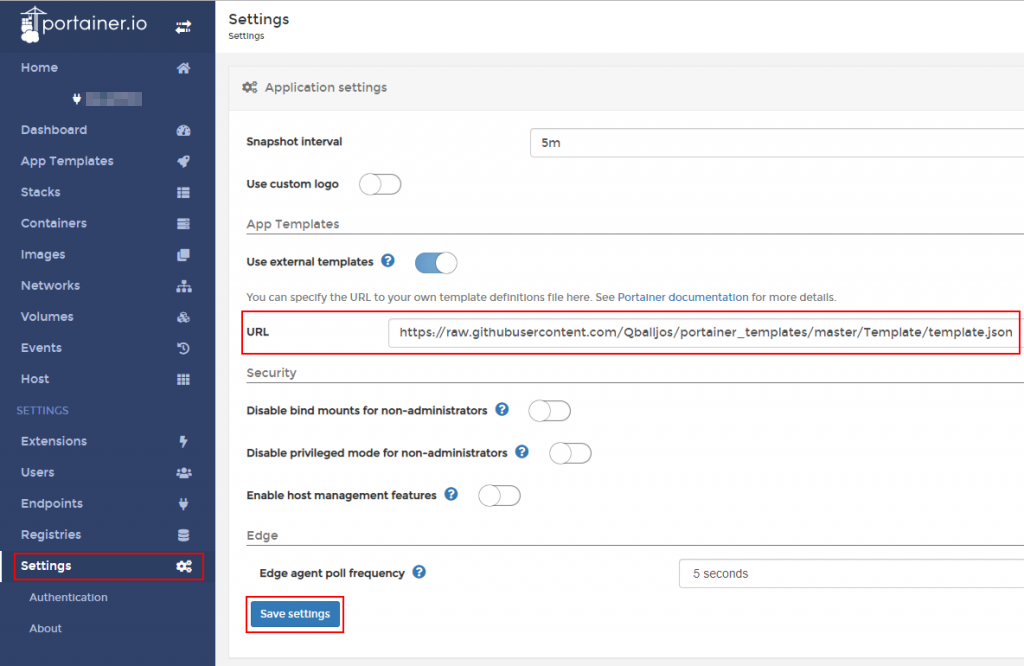
The number of default application templates you can find in Portainer are very limited. I stumbled upon linuxserver.io who provide a really great repository with a lot of more templates. You can actually add their repository within Portainer.
Go to Settings and enter the following URL in the URL field (you might need to activate Use external templates):
https://raw.githubusercontent.com/Qballjos/portainer_templates/master/Template/template.json
Then click on Save settings to activate it:
Now go to the App Templates part and browse even more templates.
Hint! You can always setup and manage any container by running the following command inside Ubuntu:
docker pull provider/container


